Monday, February 21, 2011

Triple A Cake - which stands for Absolutely, Amazing Apple Cake!!!

I made this Triple A Cake (the name and recipe is adapted from Lynda's Apple Cake) for my friend Jess M. who came to town to visit me a few weeks ago.  She loves apples.   So do I.  Although in the past, I have had trouble baking with them, like in this sour cream apple bars disaster.  (Hahaha!) 

Jess and I both really enjoyed this recipe.  After tasting it and eating on it for several days, I changed the name to Absolutely, Amazing Apple cake because that's just how good it is.  Just calling it "apple cake" didn't do this dish justice!   I cut my cake into 20 slices and even shared some with my friends Briony and Jen.  They both raved about it.  In fact, Briony has been bugging me for the recipe for weeks now!   Good things come to those who wait my friend~ ;-)

So here is the recipe and a few mouth-watering photos I took of it too.  You may notice that a small slice is missing from the photos.  That's because I couldn't wait to bite into it, not even for a two-second photo.  That's how great it is!   Now go on.... Amaze your friends and family with this wonderful dessert! 


Triple A Cake (or the absolutely, amazing apple cake!)
(Serves 20, or makes about 20 slices)

Adapted from Lynda's Recipe Box

4 medium apples, chopped into small pieces (any baking apple will do.  I used gala and delicious red)
1 and 1/2 cups of sugar (I used 1 cup of white and 1/2 cup of brown sugar)
2 eggs, beaten
1/4 cup of oil
3/4 cup of applesauce
2 cups of unbleached flour (I used the white wheat kind by King Arthur)
2 tsp vanilla extract
2 tsp cinnamon
1/2 tsp salt
1 cup of chopped nuts (I used almonds and I grinded them up into bits)

Preheat oven to 350 degrees.  Generously grease a 13x9 inch baking pan with cooking spray.  Peel, core and chop your apple into bite size pieces.  Place them in a large bowl.  Add in the sugar.  In a separate large bowl, blend together the flour, baking soda, salt, cinnamon and nuts.  (Note: I chose to grind up the almonds I used because my family isn't fond of them in whole form!)  Stir the apple-sugar mix.  Then add the applesauce, oil, eggs and vanilla extract.  Mix all liquid ingredients well.  Pour the liquid-apple mixture into the flour-salt dry mixture.  Blend well with your spoon until ingredients no longer have any dry spots.  The dough will be thick.   Spoon or pour out the batter into the 13x9 inch baking pan.  Bake for 40 to 50 minutes.  Mine was ready in 45 minutes.  Remove from the oven and begin making the caramel sauce to top the cake.


Here is what the cake looks like when it's finished baking, before the caramel topping is added:


Topping for cake: Caramel sauce
(Makes about 1.5 cups)

Also adapted from Lynda's Recipe Box

1/2 cup light butter
1 cup light brown sugar
1/2 cup whipping cream (I used a fat-free cool-whip container that I had on hand)
1 tsp. vanilla extract
1/2 tsp almond extract (optional but I purposely added this!)

In a medium sauce pan, melt the butter on the stove. Add in the brown sugar.  Cook on medium heat.  Stir frequently until the liquid begins to boil.  After sugar and butter liquid is boiling, remove from heat.  Add in the cream (or cool-whip like I used), vanilla and almond extracts.  Whisk until smooth.  I let the sauce cool down and thicken for about five minutes before pouring it over the cake.  You can do what you like.

Check out how wonderful it looks when the caramel is just oozing out the cake and off the top~!    Mmmmmmm......


Lick your lips and enjoy seconds on this one.  This cake becomes moister with each passing day.  I ate a slice every day for five days and it just seemed to get better and better~!  I also froze two pieces and ate them a week later.  I simply placed it in the fridge overnight to thaw.  This is very good and you'd never know it wasn't fresh from the oven!


Sooo, soooo good!  Enjoy this recipe!   I'll be sharing a Baked potato pizza recipe and some other fun posts this week!  Stay tuned! 

Saturday, February 19, 2011

What's Cookin' This Week (Feb 21 - 27, 2011)?


I'm just getting back from a road trip so I'm starting off simple this week so I can catch up on laundry and such.  Then I'll try a few new meals and snacks in the coming days.   Here's the plan:


Monday, Feb. 21 - Eat from freezer: Unstuffed Peppers Casserole (recipe is from my cookbook), side of corn


Tuesday, Feb. 22
- Six Can Refried Bean Soup, serve with guacamole and chips.   Also, take time to do some purees of broccoli, cauliflower and spinach!


Wednesday, Feb. 23
Balsamic Chicken Sandwiches with sweet potato fries


Thursday, Feb. 24 - Breakfast for dinner: Sausage and Biscuit Casserole with a side of grits


Friday, Feb. 25 - Eat from freezer: pepperoni and spinach pizza


Saturday, Feb. 26 -  Turkey-veggie meatloaf (recipe is from my cookbook), serve with field peas and side salad


Sunday, Feb. 27 - Slow Cooker Ham and Vegetables - serve with a side of homemade bread


AND


Here are the snacks that I hope to make this week as well:


(1) Lime Meltaways


(2) Chocolate-Banana Muffins


(3) Feta and Herb Dip


(4) No-Bake Cookies - I'm going to change up this recipe and lighten it up!


What's on your meal plan this week?  In the coming days, I'll share more great recipes, another loser cook moment and an update on my breadmaker too!  Stay tuned for more fun!

Thursday, February 17, 2011

Learn With Me: How To Rid Your Kitchen From Burnt Smells!

I can't be the only person who's ever burned something in the kitchen?!  However, recently was the only time I ever thought to take a stand on it and not let the odors overpower me! 


Therefore, I give you my third installment of "Learn With Me".  These are segments where I share tips that have helped me around the culinary table.


When I created my "I Love You Candy Bars" over the weekend, I made the mistake of microwaving the chocolate for a little bit longer than I intended.  The end result was a big chunk of burnt chocolate.  It looked like this:


Anyone for burnt chocolate?  Yeah.... I didn't think so!


The awful smell was immediate!  The odor followed you ALL over the house, no matter what room you entered.  It quickly began making me bonkers!   Instead of opening up the windows and turning on extra fans, I did several online searches on how I can remove the odor in a more natural fashion. 


Here are some suggestions that I discovered:


(1) Place vinegar and water together in bowls all over the kitchen and even in the microwave if the burnt episode happened there.  You can leave them out for several hours or even overnight!


(2) Lemon juice and water mixed together can also work, if you don't have vinegar on hand (or if you're just not a fan of the smell!)


(3) Several folks recommend just placing water with some cinnamon mixed in.  Cinnamon is a strong spice that can quickly overtake a room but in a good way!


(4) Put vanilla extract (or other extracts like lemon, almond, peppermint, etc.) on cotton balls and leave them out throughout the kitchen.


Or if you do NOT have cotton balls on hand (like I didn't) find something else that can absorb liquid just as well, like a maxi pad from your bathroom drawer:


Oh yes, I am serious!  I really did grab an un-used sanitary napkin to set it on display in my kitchen to absorb the burnt chocolate smell!  I figured that looking at a feminine product was still better than inhaling smoke-like fumes!

Yes I am crazy!  But wait, it gets better! 

This above photo is the second maxi pad I used.  For the first one, I poured vanilla extract over it.  So it looked like brown liquid was running off the sanitary napkin.  So yeah.... I didn't want to leave that out for several hours for my husband and any neighbors to see.  I threw that one away and pulled out another one to use.  This time I used my clear peppermint extract which left no "residue" on it making it much more pleasing to see..... well, as pleasing as a maxi pad can be sitting there in the middle of a kitchen counter I suppose.

Hey, whatever it takes right!  I tried all the above four suggestions on how to rid my kitchen of a burnt smell.  And I must be honest.... they all worked!  I used a combination of them all and left them out for 6-7 hours.  I even left the house to bring my daughter to the park.  When I walked back into my home, I never knew that I had burned anything! 

So I just had to share these tips and my experiences with you!  I hope you enjoyed them.  At the very least, I bet I gave you a chuckle or a head shake for the day!  :-)


I will try to be back here on Sunday but we'll be traveling so I'm not sure if it will happen like I want.  Therefore I may be late in posting my meal plan for next week.  I can tell you that it's going to be eating from the freezer for the first few days and then trying one or two new recipes at the end of the week.  So, have a great weekend everyone! 

Wednesday, February 16, 2011

Tofu Sloppy Joes

Not long ago, I talked about scary foods and also my challenge to cook in new ways in 2011.  Tofu was on the list for both of those notions.  I've been afraid of it and I want to cook more vegetarian.  So I decided to conquer my fear.


Truthfully, tofu isn't scary looking.  It just sounds fearful because it's deemed healthy and something only vegetarians eat.  When you open up a box of it, tofu has no smell.  Mine looked like cubed pieces of chicken already cut up.  I saw a recipe online for tofu sloppy joes which gave me the idea for this recipe.  However, I followed the ingredients and method for sloppy joes listed in my cookbook instead.


After I made the tofu sloppy joes, I took a bite of it.  I let it sit in my throat for a bit, absorbing the flavor.  I thought to myself.... "Well, this isn't bad.  But it isn't outstanding either."  I swallowed it.  I set it aside and did a few chores.  I went back to it and tried it again.  "Better," I thought to myself.  I took four or so more bites and then decided, "Hey, I do like this after all!"  The tofu really soaked up the spices and flavorings of the all the vegetables I mixed in with it.  I hear that is what it does well.  Tofu itself doesn't have much taste but it truly adapts to whatever it is you're cooking it into or with!


The next day I had it for lunch and liked it even more!  Does this ever happen to you?  Or am I the only weird one like that!?   Each time I ate it, the flavor and idea of tofu grew on me.  So try it out and see if you like it too!


Tofu Sloppy Joes
(Serves 6)

Adapted from my own cookbook's Sloppy Joes recipe


8 oz extra firm, cubed tofu
1 green bell pepper, diced
1 onion, diced
1 cup salsa
1/2 cup shredded (or pureed) carrots
1/2 tbsp soy sauce
1 tsp balsamic vinegar
1 tsp oregano
1 tsp basil
dash of salt and pepper


Generously grease a large skillet with cooking spray.  Cook the onion, green bell pepper and carrots for about five minutes.

Remove the tofu from packaging and mash in a medium size bowl.  Add in the soy sauce, balsamic vinegar and salsa.  Mix well.  Then add the seasoned tofu to the skillet.  Sprinkle in your remaining seasonings = basil, oregano, salt and pepper.  Cook on medium heat for about fifteen to twenty minutes. 


Serve tofu sloppy joes on whole wheat buns or tucked inside whole wheat tortillas.  You can top with cheese or additional seasonings if you like. This recipe is packed with protein and healthy benefits.   Leftovers will keep in the fridge for up to three days.  You can also freeze them for up to two months and reheat in the microwave on or the stove. 

See if your family will eat it.  Tell them it's chicken!  :-)  I'm going to cook with tofu again soon.  In fact I found a wonderful silken tofu pudding recipe that sounds heavenly so I plan to make that in the coming weeks! 

Tuesday, February 15, 2011

Creamy Chicken and Butternut Squash Spaghetti

I love having leftover chicken from a barbecue.  I can always turn it into a fabulous new meal and forget that it was once grilled chicken that came from the outside pit.  After our non-Superbowl party, I had four chicken breasts that were not eaten.  So I diced them up and threw them into a chicken spaghetti recipe that I saw recently that sounded really tasty. 


Of course I had to put my own spin on it.  I felt compelled to throw in a vegetable.  Since I knew the sauce would be an orange-cheese color, I opted for some of my pureed butternut squash.  It blended in perfectly and the subtle, sweet flavor was completely overlooked by my husband and daughter.  I also added reduced fat cream cheese and cut the noodle amount in half because I like more sauce, less spaghetti.  I was really pleased with end result.  I think your family would really enjoy this one!


Creamy Chicken and Butternut Squash Spaghetti

(Serves 6 to 7)
Adapted from You Go Girl!

2 cups of pre-cooked, diced chicken (about 4 medium size boneless breasts) - I used leftover BBQ chicken
8 oz of whole wheat spaghetti noodles (half of a typical box size)
1 can of cream of chicken soup
1 can of cream of mushroom soup, fat-free
1 can of diced tomatoes with chilies (such as Ro-tel), drained
1/2 cup of pureed or finely chopped butternut squash
1/2 cup of chicken broth
4 oz (1/2 cup) of reduced fat cream cheese
1 tsp onion powder
1/2 tsp garlic
1/2 tsp salt
dash of pepper
1 cup of reduced fat shredded cheese (I used a combo of cheddar, mozzarella and Mexican flavors)
1/4 cup of grated Parmesan cheese


Preheat oven to 350 degrees.  Cook your spaghetti according to package directions with a few dashes of salt in the water.  While pasta is cooking, generously grease a large skillet with cooking spray.  Toss in your pre-cooked, diced chicken, drained tomatoes with chilies, chicken broth, cream of mushroom soup, cream of chicken soup, butternut squash, cream cheese, garlic, salt and pepper.  Cook over medium heat and simmer for about 10-15 minutes. 


Meanwhile drain and set aside the spaghetti noodles.  Generously grease an 11x7 inch baking pan (or use an 8x8 size pan).   Set this aside. 


To your skillet sauce, add the 1 cup of shredded cheese until melted and blended.  Remove from heat.  Toss in your cooked spaghetti noodles stirring until coated well.  Pour spaghetti into the greased baking pan.  Top with the 1/4 cup of grated Parmesan cheese.  Bake in the oven at 350 degrees for 20 minutes.  Remove and let the spaghetti cool for a few minutes before serving. 


We served our with seasoned green beans and garlic bread.  I froze 1/3 of it and we had enough for us all to eat for two nights in a row. 


I loved how the topping was a little bit crispy when you bit into it.  Such a nice touch!  Enjoy!

Monday, February 14, 2011

I Love You Candy Bars

Happy Valentine's Day and Happy Monday to you!  I felt a little bad about my lack of Valentine's Day spirit last week with my "Un-Valentine's Chocolate Broken Heart Treats" post.  Therefore I made up for this weekend.  I somehow got into the romantic spirit to make my loved ones the following treats - giant candy bars and red-swirl cupcakes. 


I even became a bit carried away and wrote "I Heart U" using dried fruit I had in my pantry.  If you like this idea, feel free to take it and make it for your loved ones today or later in the week.  It's very easy and requires only a few basic ingredients. 


Well I say it's easy when I actually burnt the white chocolate on my first try.  Have you ever had burned chocolate in your home before?  It's awful - just like any typical burnt smell in your house.  I did have fun with learning how to remove the terrible odor though and will share that tip later this week in a new "Learn With Me" segment. 


Anyway, here's the recipe for you:


I Love You Candy Bar
(Makes Two Giant Size Bars)

11 oz (1 bag) of chocolate chips (I used Ghiradelli all natural white chocolate chips)
2 tbsp orange juice (optional)
1 tsp water
1/2 tsp almond extract
1/2 tsp vanilla extract
About 30 pieces of dried cranberries
2 large dried apricrots


Place parchment papers into two greased bread loaf (9 inch) pans.  Keep them close by. 

Line up your dried fruits on a piece of napkin or paper plate.  Write out the letters for "I" and "U."  Take the dried apricrot which is normally oval shaped and shape it into a heart.  Carefully use a knife to cut that apricot into a heart.  I made a small sliver down the top center and trimmed the edges at the bottom to form the triangle.  Set all the dried fruit pieces aside.


In a small sauce pan, pour the chocolate chips.  Melt the chips over medium-low heat, stirring frequently to prevent it from burning or sticking.  As the chocolate is mostly melted, add in the orange juice, water and extracts.  Continue stirring until completely smooth.


Pour the melted chocolate onto the parched baking pans.  Use a spatula to spread out the chocolate evenly, making it the size and shape of the bread pan (a rectangle - large candy bar size). 


Once the chocolate is spread, grab the dried fruit pieces.  Line them up to spell out your "I Love (Heart) You" message.  I made mine go verticle (downward), like this:


Repeat this for the second candy bar too. Place bars in the fridge for at least two hours to harden.  Then serve to your special someone. 


Candy bars should remain in the fridge until ready to serve.  Leftovers should be stored in an air-tight container.  Or you can freeze the chocolate for up to two months and eat again later.  Enjoy!

On Saturday, I also made a batch of marble swirl red velvet cupcakes as well.  They turned out very pretty so I took a photo of them:


I followed this recipe exactly to make them.  Try them out too!


Happy Valentine's Day to you!  Do you have anything special planned? 

I woke up early and made my husband a breakfast bagel (homemade I should add!) with scrambled egg and cheese.  Tonight he's bringing home dinner for me so I don't have to cook.  Not a bad trade-off, I think!  Enjoy your day!

Sunday, February 13, 2011

What's Cookin' This Week (Feb 14 - 20, 2011)?


This week will be an easy one as far as meal planning goes.  I will be out of town in a few days so the cooking will be on someone else - hooray!  


Therefore, I will keep things simple and only try one new meal and two new snacks.  However, I'll still be posting great, new recipes for you to enjoy along with a hilarious learning tip too!   Here's how the calendar will go:


Monday, Feb. 14 - Valentine's Day: We're having takeout and eating dinner at home- either sushi or Greek food.  I will, however make my husband's favorite dessert for him - banana toffee squares (Recipe is in my cookbook).


Tuesday, Feb. 15
- My Homemade Slow Cooker Chili


Wednesday, Feb. 16
- Greek Chicken Gyros and Quinoa Salad - This is very NEW for me.  I've never cooked with quinoa or make my own tzatziki sauce before! 


Thursday, Feb. 17
- Traveling - will eat out


Friday, Feb. 18
- Family Dinner Outing


Saturday, Feb. 19
- Traveling - will eat out


Sunday, Feb. 20
- Traveling - will eat out


Monday, Feb. 21
- Eat from freezer - Unstuffed Peppers Casserole (Recipe is from my cookbook)


AND


Here are the snacks that I will make before we do some traveling:


(1) Cranberry Oatmeal Bars - These look yummy.  Best of all, I have all the ingredients on hand!


(2) Dirt Cupcakes - I'm making these for a group of kids - for a playdate that I'm hosting on Wednesday

(3) No-Bake Granola Bars - If I have time I will make a new batch of these to bring with us while we travel over the weekend! 


Everyone have a wonderful week!  I am going to enjoy my time away from the kitchen and the opportunity to read for hours in the car!


Thursday, February 10, 2011

What Food Best Describes You?

This morning I woke up to a wonderful surprise - an email that a new friend sent to me thanking me for organizing a special event the other night.  I belong to a woman's group/ moms club where I occasionally plan activities for the members.  Tuesday night we had a spa social event where I found volunteer women (including one who is in our club) who gave us great information and luckily a few free samples of skin care products, facial lotions, oils for massages and more.  Everyone seemed to have a great time. 

One of the ladies who attended sent me a very kind email comparing me to food.  It may sound odd but I absolutely loved it.  Her words brought a huge smile to my face and I just HAD to share it here instead of the planned post I was going to upload.  No, I want to remember these words - my first comparison to food~  :)_

Here's what she told me:

------------------------------------

Mandy,

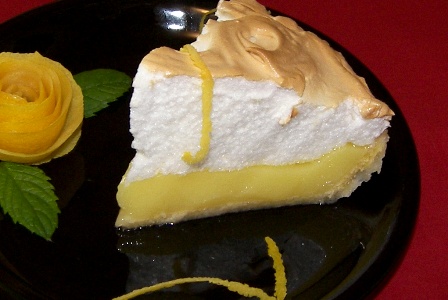
I think if you were a food, a fitting analogy don't you think, you would be a lemon meringue pie!? I know, wait, I'll explain....

Certainly to look at from the outside (you're) an altogether pleasing package with a sweet, simple, feminine, light and easy start.  

But underneath all that meringue one discovers the more complex, unexpected contrast of the tart, intricate, rich flavors that leave one pleasantly surprised and delightfully satisfied by the encounter!

That's you, a Lemon Meringue Pie!


Food Regards,
-A.C.

-----------------------------------------


Wow, I was practically speechless when I read her sweet words.  When my husband reads these lines later today, he may ask, "Umm, is she was flirting with you?"  No sweetie, that's just how we unique and special women are -- we can talk in a way that's sexy and beautiful and complimentary with no strings attached or no hidden agenda behind it (the way that men do).   Plus, you'd have to know this woman friend....  Every thing she says is interesting and poetic in some manner.  And she speaks in an accent making her even more wonderful to listen to.

So thank you to my friend for those sweet words.  It truly made my day! 

I'm so flattered and honored and RELIEVED that she didn't compare me to a Fruitcake OR a Nutty bar.  LOL!  :-P

Seriously though, I actually LOVE lemon-flavored desserts!  I just made my famous lemon bars last weekend for a barbecue.  I have never, ever made a lemon meringue pie though.  So now I MUST add it to my list of recipes to make this year!  You've inspired me girl, thank you! 


Have any of you ever made a lemon meringue pie?  Do you have a good recipe to share with me? 

If somone were to compare you (your style/personality) to a food item, what do you think it would be?  Or how do you compare yourself?  Come on' folks - don't be shy....  Let's dish about food! 

Here is a quick and fun food quiz I found online that you can take -  It asks you five questions then compares your results to a food item.  Let me know your quiz results in the comments section!  http://www.blogthings.com/whatkindoffoodareyouquiz/

I'm taking tomorrow off to spend time with family so I will be back on Sunday with my meal plan for the week and fun things in store for the coming days.  I hope everyone has a great couple of days until my return!