Sunday, December 4, 2011

Updates, Baby Gender Reveal, the Holidays and What's to Come!

Wow, where does the time go?  It flies by, just like the expression says.   I decided I needed to come on here and give a few updates. 


I did more cooking and prep work in the past two days than I've done within the last three months!  I pureed broccoli and carrots.  I boiled and chopped up three cups worth of chicken.  I made my better for you baked spaghetti and meatballs and froze half for later.  I also made my fiesta-style beef and veggie soup (from my cookbook) which I froze 3/4 of it for later.  I made banana waffles for breakfast this morning and even baked ginger snap cookies too.  Then I even made a meal plan for the week, something I haven't done in a long time! 


Sunday - Spaghetti and Meatballs, garlic bread
Monday - Beef and bean enchiladas, salad
Tuesday - Balsamic Chicken Wraps, sesame green beans
Wednesday - Leftovers or sandwiches
Thursday - Black bean burgers, baked chips with salsa
Friday - Homemade pepperoni pizza
Saturday - Eat out or leftovers
Besides all the cooking I did, my husband and I cleaned out rooms, threw out a bunch of trash and tidied up like we hadn't done in weeks.  I guess you can say I'm officially "nesting" now.  I'm now 19 weeks pregnant and doing great.  We just had the gender reveal on Friday too.   It's a.............


It's a BABY!  Hahaha!


It's actually another GIRL!  Yay!  GIRLS RULE in my house now!   Years ago when I had two pets and a husband, I was outnumbered.  Now we're down to two males (my hubby and our dog) and we'll be three girls in the house now. 
 
Hooray!  Another Girl for the Fernandez family!  I am soooo, soooo happy!   Even though I tried to remain gender neutral throughout the pregnancy, the closer we arrived to our ultrasound day, the more I wanted another girl.  Maybe it's because my daughter Vivian has said she's wanted me to have a girl all along.  Every time I asked her, she would say that she wanted a sister.  Or maybe it's because so many people (my husband, father, even my mother-in-law and friends) wanted me to have a boy and I like to be opposite of the majority.  Or maybe it's because a big part of me has always wondered what it would be like to have a sister since I didn't have one.  Whatever the reason, I'm just overjoyed to be having another girl. Girls are what I know.  I can reuse all the same things.  And I can watch Vivian make a best friend for life, someone who understands her as a woman and she can share secrets with growing up, something I didn't have.  I'm soooo, soooo thankful for another precious girl in my life!   Woo-hoo! 


With working and preparing for this baby, I really haven't thought much about holiday baking or cooking.  In fact, we'll be visiting family over Christmas so I won't be doing any cooking.  (Yay!)  I can take it easy and let someone else do the work for the change.  I'm looking forward to relaxing.


I've also decided NOT to participate in any Christmas parties or cookie exchanges this year.  My heart just isn't in it this year and I don't want to spend hours making 100 cookies.  I also don't want 100+ cookies around to tempt my already pregnant, overeating self this year!  No, I'm happy to take off from the hustle and bustle exchanges this year so I can just focus on my family and do my own prep work for the coming months when I become uncomfortable and don't even feel like lifting a finger.


So what does all this mean for this food blog, Learn-Laugh-Cook???  I'm not exactly sure!  I am still around cooking and baking but I've not really made anything new lately.  I've also not wanted to spend an hour blogging in my precious time off.  Yes, sadly it usually takes me about an hour to do each blog post by the time I type it, proofread it, include any photos and more.  Therefore, I'm not sure how much I'll be around in the beginning of 2012 and beyond.  I won't completely go away though either.  I'm just busy and focused on other things.  I still try to share or post weekly on my Facebook page though!  It's easier to jump on there and chat or share a link than it is to post here on Blogger. 


All I know is that I'll follow my gut and my heart.  If I want to be here, then I will be.  If I have something to share, then I will.   But if I'd rather play with my two girls or just curl up for a few rare moments alone, then I'll do that too. 


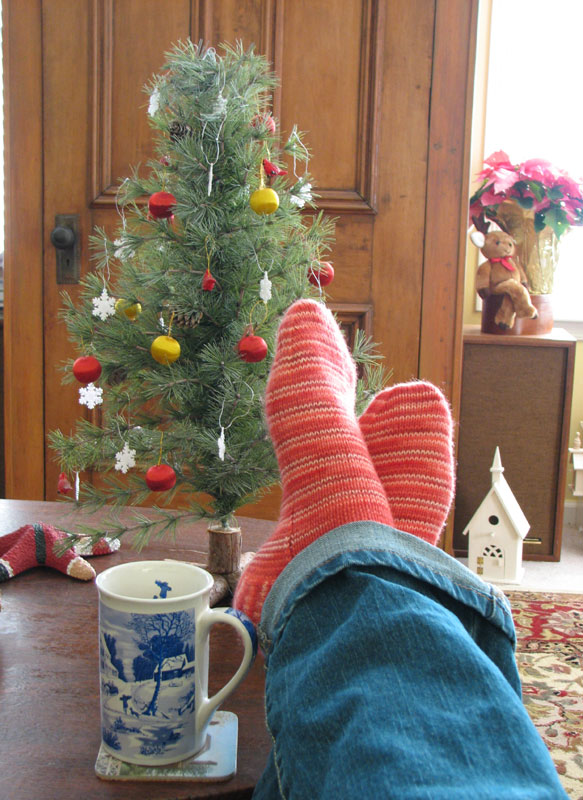
I'd like to wish you all a very MERRY CHRISTMAS and a HAPPY NEW YEAR!  There are so many great food sites out there and Pinterest and other venues now where you can find tons of recipes, ideas, meal plans and more.  You don't really need me anyway.  But when I need to share more with you, I'll be back!  Until then, take care of yourself.  Have a wonderful Holiday Season!  I know I will. 

From my family to yours, love and best wishes always!


Wednesday, October 12, 2011

Here's What I've Really Been Cooking These Days.... :-)

Hi there!  (Echo, echo, echo, echo....)  I know it has been quite a long while since I have posted on here.

Well I have a very good reason for that.  And here it is - see below photo:


That's right, I've been cooking something alright, slow cooking I guess you could say.  And this little dish of mine (aka tadpole, peanut, jelly bean, future baby) is due to be done on or around April 27, 2012.

Yes, I'm 12 weeks pregnant!  Our family is thrilled!  It's taken us quite a long time to cook up this baby, much much longer than it took for my beautiful daughter Vivian who turns four years old in just two weeks.  So we're just happy our moment has finally arrived. 

So you see, the thing is that I haven't felt like cooking.  My eating habits have been like a roller coaster - some days I feel like eating and other days, I can't hardly stand food or the smell of food.  That's why I haven't been posting or sharing recipes.  I haven't really done a whole bunch of cooking these days, definitely not anything new.  I've been eating from my freezer a lot. 

I had hoped that I'd be an exception to the pregnancy rule and not feel nauseous and be able to cook, eat and share recipes.  BUT that just hasn't been the case for me. 

Also with me working full-time, by the time I come home from work, I'm rather tired.  Too tired to even post on here or look at my fellow foodie bloggers too.  I'm sure this will pass.  When I was pregnant with my daughter, I felt my best during the second trimester and was able to do so much.  Maybe I'll feel that way again and will be back to some kind of normal posting and sharing ideas schedule.  Time will tell. 

It's sad too since I normally LOVE the fall time and all the food associated with it - pumpkins, apple dishes, soups, stews, holiday foods, etc.  But I can't stomach even thinking or talking about it too much right now. 

Oh well, it's all for a good cause, right?  And look, my daughter is getting in some practice as a big sister (see photo below!)  :-)


Vivian can't wait to be a big sis!  Although I think it mostly has to do with just bossing someone else around~!

Until my next post, I hope you're doing well and enjoying this wonderful season.  Thanks for checking in here from time to time.  I'll keep you updated whenever I can. 

Thanks!  Lots of love to you! 

-Mandy

Monday, September 12, 2011

Unstuffed Peppers Casserole

Do you like stuffed peppers but find them a hassle to eat?  I don't know about you but when I'm hungry and ready to dig in, I don't feel like doing a lot of cutting with my knife and fork.  I'm impatient, what can I say!?  

I have always enjoyed stuffed peppers but I didn't want to spend minutes cutting up those glorious peppers during dinnertime.  Therefore over a year ago, I came up with this casserole dish that uses all the same ingredients as stuffed peppers.  You do the hassle beforehand so you can eat and enjoy when it's time to pull from the oven.  Now I never want to eat a regular stuffed pepper again.


Unstuffed Peppers Casserole
(Serves 6 to 8)

1 pound of lean ground turkey (or use regular ground meat if you prefer that)
3 bell peppers, diced  - I like to be colorful and use 1 green, 1 yellow and 1 orange
2 cups of cooked brown rice
2 cups of reduced fat shredded cheese, cheddar or other variety
1 jar (24 oz) of spaghetti or tomato sauce- all natural kind (I used Parmesan Romano)
3 cloves of garlic, minced (or use 1 tsp garlic powder)
2 tsp onion powder
1 tsp Italian seasoning
1 tsp oregano
1/2 tsp salt
1/4 tsp pepper
Preheat oven to 350 degrees.  Spray a 2 quart deep pan and skillet with cooking spray.  Set aside. 


Dice your peppers into small pieces.  Toss them into a skillet along with the defrosted ground turkey meat. Brown ground turkey meat with garlic and diced peppers in skillet.  Add in the Italian seasoning, onion powder, oregano, salt and pepper.  Mix well.  Cook for about ten minutes. 


Remove from heat and pour into large bowl.  Add spaghetti sauce, cooked brown rice and 1 and 1/2 cups of the shredded cheese to bowl. 


Spoon peppers casserole into 2 quart pan.  Sprinkle top with remaining 1/2 cup of cheese.  Bake at 350 degrees for 25 to 30 minutes. 


Let it cool for a few minutes before slicing.  Serve warm.


Freeze any leftovers in plastic containers for up to four months.  Reheat in microwave or in the oven. 

Try it!   You won't be disappointed.  This is an often-requested dish from my family and friends.

Monday, September 5, 2011

Pumpkin Custard Cake


Pumpkin custard cake


I made this AMAZING pumpkin cake over the Labor Day weekend.  It came out so delicious.  My husband used the words "light, moist and airy" to describe it.  Haha! Doesn't he sound like a chef or a baker's expert?  LOL!  But seriously, it was that good and it was sooo easy to make!  This is more of an indulgence when you feel like it.  Certainly I wouldn't call it a healthy dessert but still worth trying, eating and sharing with friends. 

You can make it with or without the nut topping.  After trying it both ways, I actually (surprisingly) prefer it without the nuts.  I find the nuts took away from the pumpkin flavor.  You can make it both ways or make it half and half (like I did) and decide what you like best. 


  This is the custard cake without the nuts, which I preferred best!


Pumpkin Custard Cake
(Makes 16 - 20 slices)

1 box of yellow cake mix
1 can (15 oz) of pumpkin puree
1 can (12 oz) evaporated milk (Or 1 and 1/2 cups of regular milk)
3 eggs
1 cup of sugar
2 tsp cinnamon
1/2 tsp pumpkin pie spice
1 and 1/2 cups to 3 cups of chopped nuts, depending on how much you like (optional!)
2 sticks (1 cup) of butter, melted


Heat oven to 350 degrees.  Grease the bottom and sides of a 9x13 rectangular baking pan with cooking spray.  Set aside.

In a large mixing bowl, combine the pumpkin, milk, eggs, sugar, cinnamon and pumpkin pie spice.  Mix until smooth.  Pour into the bottom of that greased baking pan.


Sprinkle the cake mix over the pumpkin batter.  You should completely cover the liquid with the mixture.  If you decide you want to use the nut topping, then you'd cover the cake mixture with the nuts here. 

Since my husband doesn't like nuts in his desserts, I opted to make half the cake with nuts and half without, as seen pictured here:


After you top with the nuts, then you drizzle the melted butter over the cake.  Cover it as best as you can. 


Then place in the oven and bake at 350 degrees for 45 to 55 minutes.  Place a knife or fork in the cake to be sure it comes out mostly clean. 


Let it cool for a half hour before cutting and serving.  You should refrigerate leftovers. 


                  Pumpkin custard cake with nut topping


This is just pure, melt in your mouth yummy goodness.  This would be great with morning coffee or a dessert wine after dinner.   Who am I kidding?  This is delicious ANY time of the day!

Enjoy! 

It's that time of year when I become obsessed with all things pumpkin.  I'm hoping to make several desserts and baked goodies this year using pumpkin.  Of course I'll share all the good recipes here!  Hope you're having a great holiday weekend!

Tuesday, August 30, 2011

Turkey-Veggie Burgers

I make these turkey-veggie burgers once a month.  We eat a few then freeze some for later.  We all love the taste.  And as a mom who's good at sneaking in veggies into foods, I'm very happy with what goes into this burger and that my family gobbles them up every few weeks. 

I save the fattening, real-meat burgers for special outings and restaurant visits now.  This is my go-to recipe for around the house, baked burgers. 

You could probably put these on the grill too but since they're pretty moist, I've always been too afraid they'd fall apart. 

Here's the recipe:

Turkey-Veggie Burgers
(Makes 7 to 8 patties)


1 pound of ground turkey
1/2 cup of pureed broccoli 
1/2 cup of pureed (or shredded) carrots
1/2 cup of oats, old-fashioned rolled
1/2 cup of Italian seasoned bread crumbs
1/4 cup of skim milk
2 Tbsp soy sauce, low sodium
1 Tbsp A-1 steak sauce (or use Worcestershire sauce)
1 Tbsp ketchup
1 tsp honey mustard
1 tsp onion powder
1 tsp garlic powder
1 tsp Cajun seasoning (or combo of salt and pepper)


Preheat oven to 400 degrees.  Grease a large oven safe skillet with cooking spray.  In a large bowl, mix together all ingredients.  Form into seven or eight burger patties. 


Place into skillet that has been greased and warmed on the stove-top. Cook one side over medium heat for about seven to nine minutes. 


Flip burgers and then place entire skillet into oven.  Bake at 400 degrees for about ten to fifteen minutes. 
Carefully remove the skillet using a pot holder since the pan will be very hot!  Serve on bread or buns. 


Leftover burgers can be frozen in freezer safe storage bags for up to three months.  Reheat them in microwave. 


Would your family try these?  My friends and family are always amazed that they're eating a burger made of turkey and vegetables that taste this good! 

Monday, August 29, 2011

Whole Wheat Biscuits

Who doesn't love flaky or golden, buttery biscuits?  I know I sure do.  Melt in your mouth yummy goodness.  But what I do NOT love is the amount of fat and calories that go into the store-bought or restaurant-style biscuits.  I shudder thinking about it.  And although these aren't a vast improvement, they certainly are way better because I make them with whole wheat and a lot less butter.  Yet they were still, surprisingly just as tasty that you were reaching for more.  From now on, I'm making these for my family.  Pillsbury can kiss my butt!  ;-P 

Whole Wheat Biscuits
(Makes 8)

 - 1 and 1/3 cup of whole wheat flour (I use the White Wheat kind by King Arthur - it's my favorite - great taste and not as harsh of a texture like other wheat flours!)
- 2 Tbsp sugar (or Splenda/Truvia alternatives)
- 2 tsp baking powder
- 1/2 tsp baking soda
- 1/2 tsp salt
- 4 Tbsp (1/2 of a stick) of butter (I use the light kind or Smart Balance) - 1/2 cup of fat-free or light buttermilk (or use regular milk with a drop of lemon juice)
- optional seasonings: dash of onion, garlic and Parmesan grated cheese (I used a 1/2 tsp combo of them all)

Preheat oven to 375 degrees.  Lightly grease a baking or cookie pan then set aside.  In a large mixing bowl, combine the first five ingredients - flour, sugar, baking powder, baking soda and salt.  Sift and mix well.  Cut in your butter with a knife until it blends into the mixture and crumbles.  Pour in the buttermilk (or just regular milk with a drop of lemon).  Sprinkle in your seasonings if you decide to use any. 


Use your hands to mix and blend.  Now knead by shaping the flour mixture into a ball then flattening and pulling the edges outward and back inward into a ball.  Repeat for 8 - 10 times.  Now place the dough on a floured surface like wax or parchment paper.  Roll it out and use a round drinking glass to cut into circle.  Make them into circles that are about 2 inches think. 


(Note: I made mine too thin, closer to 1 and 1/2 inches.  They still came out tasting great but they were a bit crumbly when I went to slice them in half to butter them!)


Spread out on the baking pan.  Bake at 375 degrees for 15 to 20 minutes or until your desired brownness.  Let them cool for about 3-4 minutes before you cut them in half to butter them or place jam on them.  I served ours with dinner (spinach ravioli).  We all really enjoyed them! 


I hope you enjoy them too!  Try making your own biscuits so you can save yourself the calories and unwanted additives in store-bought biscuits!


Wednesday, August 24, 2011

Birthday Cake #3: Cookie Crumb Fudge Layer Cake (aka - the messiest cake ever!)

Now for the final event - the moment you've been waiting for.....  My third and final birthday cake!  Or as I've named it -- the messiest cake ever! 

It was so messy, I even had a casualty from baking it.  That's right I had to throw away a towel because it was so covered in cake and chocolate, I couldn't imagine it ever being clean again.

So Rest.In.Peace my dear kitchen towel - wasn't that a grand way to leave this earth?  Death by chocolate cake! 


And now for the recipe and disaster photos.  Then somehow I turned this MESSY cake into something quite amazing. 


Cookie Crumb Fudge Layer Cake

To make the cake:
(Makes 2 round 9-inch cakes, for a double layer)
3 cups of flour (I used organic, unbleached white)
4 tsp baking powder
pinch of salt
2 cups of sugar
1 cup of butter
4 eggs
1/8 cup of vanilla extract
1 cup milk (I used 1%)


Preheat oven to 350 degrees.  Generously grease two 9-inch round cake pans with cooking spray.  Set aside.

In a medium bowl, place your flour, baking powder and the pinch of salt.  Mix well and let it sit while you prepare the remaining ingredients.

In a large mixing bowl, cream the sugar and butter together.  Then beat in the eggs, one at a time.  Stir in the vanilla extract.  Add the flour mixture to the wet ingredients and beat for about two minutes.  Pour in the milk and beat until smooth. 


Pour the batter evenly into the two greased cake pans.  Bake at 350 degrees for 35 to 45 minutes, depending on your oven.  The cake should pull away slightly from the sides and be lightly brown, like this:


While the cakes are baking, you can start the prep work for the frosting and filling. 


To make the vanilla butter-cream frosting:

3 cups of confectioner's sugar
1 cup of butter (2 sticks, I used Smart Balance)
2 tsp vanilla extract
2 to 4 Tbsp of whipping cream (I used fat-free evaporated milk)

In a large bowl, place the sugar and butter together.  Mix on low speed until blended.  Then increase the speed to medium and continue beating for another 3 minutes.  Add in the vanilla extract and whipping cream (or milk) and beat for another minute.  It should be creamy and smooth like frosting.


Be sure the cakes have cooled for an hour or longer before you begin frosting.  I've made that mistake many times - became hungry and greedy and tried to frost too soon and then pulled off half the cake by frosting it! 
I actually let my cakes cool overnight this time.

After the cakes are well cooled, transfer them to a new container (Tupperware, or other cake holder) and place wax paper beneath it.  Then frost the cakes.  It's fun and pretty, well at least in the beginning anyway....


Since I made a double-layer cake, I now needed to make the filling to put in between the two cakes.  


To make the filling
1 package regular Oreo (or similar sandwich style) cookies, half of them should be pureed into crumbs (about 2 cups).  The other half should be smashed and broken into bits. 

Place your Oreos in a food processor as whole cookies, like this:


Then puree them into bits, like this:


Or you can be totally lazy and buy an already used package of Oreo cookie crumbs.  I think I may do that next time!  Less work, less mess!

Once you've smashed up and broken several Oreo cookies, you'll place them directly on the frosted cake.  So they are part of the cake "filling."  Here is what mine looked like and here is where the problem started:


When you put this much on your cake, it kind of makes the second layer on top of it become lop-sided and awkward, like this:


For some reason, this reminded me of a strange-looking hamburger.  But WAIT, IT GETS WORSE!


After I put the frosting on it, the cake looked like tooth decay, like a dirty mouth beginning to rot.  What do you think?  (see below photo)


I should have stopped here.  I really should have.  But I kept going.  And things just got MESSIER and MESSIER.

After I did my best of frosting the cake, now comes the never-ending trail of topping.


For the cake topping:
1 can of chocolate syrup (fudge topping) - I used Hershey's syrup
2 cups (or a bit less or more) of the Oreo cookie crumbs - the ones you already pureed

Now is the time to put a towel or two or ten under your cake.  After your cakes are frosted, gently and slowly pour the chocolate fudge over the cakes.  Or be a rebel and get it everywhere like I did....


Cover the cakes as best as you can with the fudge.  Curse if you need to as you're wiping up chocolate from the table.  Or down the wall.  Or just wherever.  Once it's black and chocolatey,  place the cakes in your freezer for an hour so it can harden.   This is an important step - don't skip it!  (Be sure ahead of time you have room in your freezer for it!)

You'll still need those towels below it in the freezer.  Check out how MESSY mine was.  You can see chocolate dripping from the sides and even on the door!  Sheesh!


Again, just when you think it's going to be easier, things go DOWNHILL once again.  Because after you have froze the cake and hardened the fudge for an hour, you are now going to sprinkle (or pour or dump) the Oreo cookie crumbs all over it. 

Don't get carried away, like I did.  See unbelievable picture below!


I MEAN HONESTLY - DID YOU EVER SEE SUCH A THING!?   My husband walked in at this point.  His jaw dropped; he shook his head and walked out.  There was no way he was entering my kitchen of shame. 

What could I do?  I had to prevail.  I was DETERMINED to make this cake wreck into cake edible! 

So after some yells, moans, groans and a roll of paper towels, I began wiping away all that excess cookie crumbs and fudge.  Wiping, wiping and cleaning away the edges of the cake. 

This is where I had to throw away my kitchen towel.  I'm going to share the photo once again..... I said a few nice words to it - gave it a proper funeral and all.


Then LO AND BEHOLD - the cake began to look presentable, even kind of beautiful too. 

Just look at it (below)!


I added a bit of the leftover frosting on the top and placed a single Oreo cookie on top.  Nice touch, huh?  I almost made it look professional!
What in the hell would it look like when I cut into it though?  Well, here's what it looked like:


Yeah, not quite as pretty.  The top layer looked heavier and taller than the bottom layer.  When I cut it, it definitely kind of fell apart and was well, crumbly.

But thank goodness, thank the heavens it tasted good.  Great actually.  Want to have a slice?


So yeah, that's what it looked like.  It had a tendency to fall apart. 
It was very delicious and I'm proud of myself for making it and sticking through it even when it was leaving a messy trail all over my kitchen. 

However, with that being said, here's what I would do differently if I were to make it again:

-
I'd make a single layer cake, not a double layer cake!
- I would skip the fudge.  Or if I were to try fudge I'd get the "Magic Shell" kind that hardens for you. 
- I would make the filling with cookie crumbs and not the smashed, up broken cookies.
- I would make a caramel frosting and/or use flavored Oreo cookies for a variety

So there you have it.  My third and final and crazy cake baking experiences for my 33rd birthday! 

When I first started the process, I thought to myself.... "Hmmm, I should make cakes more often.  Maybe I should challenge myself to make one cake per month.  Something new and different."  But to be honest, by the time the third cake was done, I was sick of it all. 

I don't mind occasionally making a cake but I prefer things like cookies, brownies and bars.  Something easier and bite-size and less time consuming. 

I'm just not a cake decorator either.  My stuff never comes out pretty.  I'm okay with that though.   I still try and it still tastes good. 

So if you've made it through this long post and you've seen all the photos, PLEASE LEAVE ME A COMMENT so I know that my two hours of typing this was worth it!  Let me know that I'm a wacky mom with crazy ideas for putting this whole thing together.  Unleash.  Let me have it.  I'm ready!  :-)  Thank you for reading and thank you for your interest in my site and my cooking adventures!


Sunday, August 21, 2011

What's Cookin' This Week (Aug. 22 - 28, 2011)

Well this is going to be a busy week.  It's the first week of school.  I work at a university so it's the first week of classes which means my phone and office will be buzzing with phone calls and people.  My daughter is switching to a new classroom with a new teacher at day care/ preschool.  And my husband is out of town, traveling for work for most of this week (so I'll be a single parent). 

So with all that being said, I'm planning to keep things very low-key in the kitchen.  I'm not making anything new - just digging in my freezer for what I already have.  That's the great thing about doing bulk cooking and preparing meals ahead of time - you can take almost a week off when you need to.  And I think I will need to do so this week! 


This may change at any moment, but here's the plan I hope to mostly stick with this week:


Monday, August 22
- Mini Shrimp and Spinach Alfredo Pizzas (using pita bread I have in the fridge and leftover shrimp cooked over the weekend)


Tuesday, August 23 - Better For You Baked Spaghetti and Meatballs (which I have on hand in my freezer!)


Wednesday, August 25 - Eat Out or grab Take out food (Chick-Fil-A or other kid-friendly restaurant)


Thursday, August 26 - Sweet Potato Soup, Hummus Dip and Pita Chips (I have both of these in the freezer too!)


Friday, August 27
- Slim Sloppy Joes in a whole wheat wrap (also stored in my freezer!)


Saturday, August 28
- Chicken Parmesan with honey mustard flavor with green beans and easy beer bread


Sunday, August 29
- Black Bean and Sweet Potato Enchiladas - I haven't made these in awhile but I'd like to have them again.  It's good to go meatless sometimes!


And what else? 


Although I'm not making any new recipes this week, I hope to do some stocking up again on purees like carrots and avocados.  I also want to make a batch of these early start muffins and a small batch of pumpkin muffins too.

I'm also going to find time to juice and zest 20 limes that my husband's co-worker gave us.  I plan to freeze most of it for later to use in margaritas, lime pie and in a chicken dish. 

I hope you have a fabulous week and have some great foods on your table!  I'll be back soon with my third and final birthday cake recipe.  You don't want to miss how I turned the disaster cake into something presentable and edible!  

Saturday, August 20, 2011

Birthday Cake # 2: Nutella Flour-less Cake with Nutella Cream Cheese Frosting


The second cake I made for my birthday week was indeed my favorite one.  It was easy, delicious and I just loved it!  I used a whole container of Nutella so of course it had to be fabulous! 

Have you ever tried Nutella?  It's like heaven in a bottle!  It's my newest best friend I tell you! ~


Enough with the talk now - let's get straight to the recipe.  And I have step by step photos of how I put it all together too.  Lucky you and lucky me for it turning out so delicious!


Nutella Flour-less Cake


(Serves 8 - 10 but only if you feel like sharing!)

1 container (13 oz.) of Nutella - which you can find in the Peanut Butter section of the grocery store
1/3 cup of light brown sugar
1 stick of butter (I used Smart Balance)
6 large eggs, separated into the yolks and whites
12 oz bag of chocolate chips, melted (I used dark chocolate)
1 and 1/3 cup of almonds, chopped into small bits (If you can find hazelnuts, then use those.  I couldn't)


For the Nutella Cream Cheese Frosting
8 oz of cream cheese (I used the 1/3 reduced fat kind)
2 Tbsp. butter
1/4 cup of powdered sugar
4 Tbsp. Nutella

Preheat oven to 350 degrees.  Grease a 9-inch round spring-form pan with cooking spray.  Set aside. 

Now grab two bowls and separate out your six eggs - with the yolks in one bowl and just the whites in the other bowl. 


This is the most tedious part of making this entire cake but still easy and quick if you have the right tool for this.  I love my egg separator.


In a large mixing bowl, combine the whole container of Nutella, brown sugar and stick of butter together.  Blend until almost smooth. 
Using a separate heat-proof bowl, melt the chocolate chips.  I use my microwave for this, heating them for about a minute; then stirring them smooth.  I microwave it a bit longer if needed.  Set this aside until you're ready to use them.

Add the egg yolks to the cake batter in the mixing bowl slowly, one at a time if possible.  Beat until incorporated.  Now spoon in the melted chocolate.  Beat until smooth.  Then add in the egg whites and the chopped almonds (or other nut of your choice).  You can simply stir those in together with a large wooden spoon. 


Transfer the batter to the greased 9-inch spring-form pan.  Shake it or smooth it down with a spoon if needed.  Mine looked like this:


Then bake it at 350 degrees for 45 to 55 minutes in the oven.  The edges should pull away from the sides just a bit.  You should be able to insert a knife inside and have it come out mostly clean so the cake isn't wet. 

It will look like a giant brownie.  And it will taste like one too....  Yummy!


While your kitchen is smelling so wonderful and your cake is cooling, you can make the frosting.  The frosting is simply amazing, probably the best I've ever eaten in my life.  I think I will make it for all future cakes.  Oh yeah, it's that good!

To make the frosting:
Grab a medium size mixing bowl.  In it place your 8 oz of cream cheese, 2 Tbsp of butter, 1/4 cup of powdered sugar and 4 Tbsp of Nutella.  Then just blend with a mixer until smooth, until it looks like this:


When that cake has cooled (and trust me, I know it's hard to wait), you can use that handy spring-form feature to transfer it into a cake-storage container so you can seal it up for freshness.  I love those spring-form pans - one of the best inventions ever!   But you should wait about an hour until it's very cooled.  Once it's cooled, spread this delectable frosting all over your cake.  Try not to lick the entire bowl before you can do so.  It's very hard to resist! 

Frost your cake, slice it up and if you feel like it, share it with a few friends or your family.  They will LOVE it!  Trust me! 


This is definitely the BEST cake I've ever made and my current, new favorite too!  I've got one more birthday cake recipe to share with you.  So come back in a few days to see that one.  I may have to include a slide show of photos from the disaster it took to put it all together!  You won't want to miss it, trust me!  It will surely give you something to laugh at - me!  :-)